
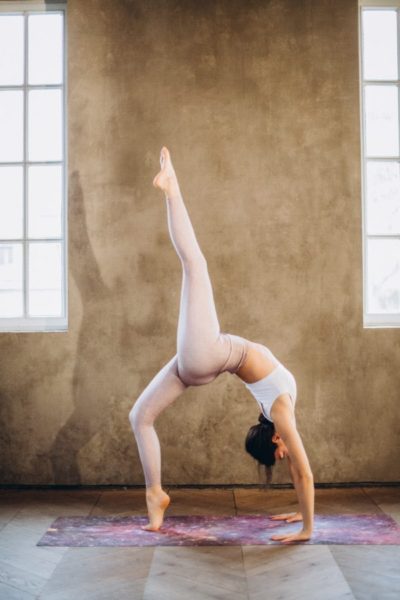
Upper Body Exercises that Will Help You Feel Your Best
**Disclaimer Note: this article does not replace medical advice, if you are in poor health or experiencing pain talk to your doctor for formal exercise, upper body workout, and pain management recommendations
Our upper body strength plays an important role in overall health. In fact, some of the most common pain related issues that affect our quality of life come from the upper back, neck, and shoulders. Today, we’re going to dive deep into the upper body biomechanics so that you can choose upper body exercises that promote balance and minimize risk for injury or pain.
I want you to feel strong and your best with your workout program, especially right now when many of us are staying fit and strong with a home workout routine. Or maybe you don’t have a strength routine yet and you’re not sure where to start. Regardless, this article is for you!
The importance of muscle balance
The muscles throughout our body are meant to work in synergy. When one muscle group gets overworked, one gets weak due to underuse, or dis-coordination occurs for some reason it can leave our entire body feeling completely off. This can manifest as pain, poor endurance for upper body activities (especially lifting or overhead reaching), or a secondary injury to one of the joints in the upper body.

Signs your upper body is out of balance
Here are just a few of the signs that you might need to make a change or start adding an upper body exercise routine to your weekly workouts (shoot for 1-2 times per week ideally).
- Poor posture- typically presents as rounded shoulders, a curved mid-back or a forward head (this is my biggest upper body weakness from year of bad posture as a teenager, student, and swimmer!)
- Chronic neck tension (constant or off and on)
- Headaches
- Chronic shoulder, mid-back or neck pain
- Poor endurance/power and quick fatigue with normal upper body activities, particularly reaching
- Uncoordinated arm movements- telltale signs of this are stiff, jerky shoulder movements and overactive/tense neck muscles with overhead reaching
Preventing injury
Outside of trauma and high impact injuries, the most common injuries in the upper body are a result of overuse and repetitive motion. This is especially true when the affected joint or muscle is repeatedly used with improper mechanics.
While we are all built a little differently, there are some similarities that we can recognize and use to establish a well-balance routine that will prevent injury or better manage those injuries you do have.
Injury prevent is so important!
Helping you recognize potential problem areas is of particular importance to me as someone that deals with off and on right shoulder pain from a past swimming injury and mid-back/neck pain due to chronic poor posture. Luckily, as a physical therapist I know how to manage these issues daily with a good routine.
Today, I imagine that without a good understanding of how to have balanced upper body exercise program, I’d have many days of lost productivity due to headaches and mid-back pain.
Consistency and awareness are key
We all might have different goals with our weekly strength programs. Understanding what you want from your program that will help determine the best sequencing and process for you. Your goals might include building strength, toning up, pain management, better posture, and so on. Knowing what goals you want to work toward will help you decide where to start.
Regardless, you should dedicate at least 10-20 minutes for upper body strengthening 1-2 times per week (consistency is key!). If you are starting at ground zero, this may be plenty for you. Or if you’re trying to build gradually and/or maintain strength it is also a great place to start. If you find yourself somewhere in between these cases, you may take some time to ramp up your efforts with higher frequency, time, or effort initially

Start with these assessment tools for an overall picture of your upper body strength, flexibility, and coordination
The shoulder
The primary stabilizing muscles in the shoulder are known as the rotator cuff. The four primary muscle groups involved are the infraspinatus (for external rotation), supraspinatus (for stabilization), teres minor (for external rotation) and subscapularis (for stabilization with arm elevation).
Other accessory muscles that stabilize the shoulder secondarily include the pecs, deltoids, biceps, triceps, and lats. While these muscles are important, the large upper body muscle groups are not meant to provide innate stability to the shoulder. When these muscles are dominant used (instead of the rotator cuff muscles) it leads to poor shoulder mechanics that can cause to tissue injury and pain. For a visual of these muscles, look here.
Shoulder strength
Of course, testing your own strength will be very subjective, but it can give you a good starting point. As you go through these, take note of pain, a feeling of instability, or muscle cramping.
- External rotation. Start by holding your arm at your side with your elbow bent to 90 degrees. Place the opposite hand against the back of your hand. Then, push against the back of your hand as if you were going to bring it toward your belly button. You should be able to match the resistance of your hand without pain or giving way of the shoulder. You should feel muscles working primarily in the back of the shoulder.
- Internal rotation. Same set up as above- this time push the hand away from the body with your opposite hand.
- Assessing rotation strength overhead. If you do a lot of overhead motion (aka athletes or certain professions), you should assess your strength with specific overhead motions too (see this video here.)
- Flexion. Bring your arm straight out in front of you to about 90 degrees. Use your opposite hand to apply pressure to the arm downward. See how much tension you can tolerate until your neck tenses or shoulder muscles give.
- Abduction. With similar set up to flexion, this time your arm will be out to the side at 90 degrees. If possible, ask someone for help to push on your shoulder. Otherwise, adjust your arm position slightly so that you can push the arm down toward your side.
- Other options. The point of these tests is to give you a starting point for your strength and a way to assess your progress. Additionally, you can also skip down to the strength exercises in this article and take note of how much weight and how many reps you can tolerate to start. Write it all down and then make goals to help you progress with your upper body strength!
**A note on strength, since there are a lot of muscle groups involved in each movement and position, so pay close attention to your “point of failure.” Is your shoulder blade is collapsing, is your neck getting tense, or is your shoulder feeling weak or painful? These give you an idea of what you need to focus on to start. If it seems to be more of an issue in the shoulders blades or mid-back, see the sections below for more insight.
Shoulder flexibility
Shoulder flexibility is crucial for normal upper body function. In physical therapy, there are some general ranges that we look for with shoulders to help optimize your function. Here is a generalized way that you can self-assess.
- External rotation. Lie on our back with the arms straight out to the side (level with the shoulders) and elbows bent to 90 degrees with the hands up toward the ceiling. Let the back of the forearms fall back toward floor as the shoulders rotate externally. The back of the hands should be within an inch of the ground or touching (without the back arching or ribs popping forward).
- Internal rotation. With the same set up as before, this time you will let your palms fall down toward the floor as your shoulders internally rotate. Be gentle with this move to avoid pinching. Your hands should get to around 6 inches from the floor (without the shoulders jutting forward or neck tensing up). You can also assess this by seeing how far up you can reach behind your back (to at least the shoulder blades).
- Flexion. While still lying down, bring your arms up over head and toward the floor. Keep your upper arms close to our ears, you should be able to touch the floor without the low back arching or ribs poking forward.
- Abduction. Start with your arms on the floor in a “T.” Keeping your arms on the floor, bring them up toward your ears as far as possible. You should be able to get within 1-2 inches of your ears while keeping the arms on the ground.
- If you are struggling with the starting position, this is a sign that your pecs are tight too!
- Others. There are other motions that the shoulder needs to achieve for good function. We addressed the 4 primary moves that tend to be restricted. You can also assess shoulder abduction, shoulder adduction, and scaption.
For a visual of active shoulder range of motion see this in depth video.

The mid-back
The thoracic spine, or mid-back, is a complicated network with layers of muscles that work to stabilize the upper spine and the entire shoulder girdle itself (shoulder blades and shoulder). These include muscles surrounding the spine plus the traps, rhomboids, and other scapular muscles. For a nice visual, see this photo here.
Mid-back strength
- The traps. The trapezius muscle is a large group that is separated into three sections based on the directions the fibers are oriented. Notoriously, the upper traps (located between the neck and shoulders) are often overused and lead to neck pain, stiffness, and knots. A great starting place for assessing your trap coordination is simple: can you squeeze the shoulder blades together correctly? Squeeze as if there is a quarter in the middle of your shoulder blades. You should be able to do it without the shoulders elevating up toward your ears.
- Middle traps. Lie on your stomach with your arms out in a “T.” Squeeze the shoulder blades together (like we discussed above) as you lift the hands and arms off the ground a few inches. See how long you can hold and how many reps- this is one can be tough!
- Lower traps. Lie on your stomach again with the arms out in a “Y” now. This will be harder to coordinate, but you should be able to lift the hands and arms off the ground a few inches as you squeeze the shoulder blades together and down the back (like you’re puffing your chest forward). Keep the neck relaxed!
- Serratus anterior. Lie on your back with your arms out in front of you and knees bent with feet flat on the floor. Keeping the upper back flat on the floor and elbows straight, push your fists towards the ceiling and hold.
- General mid back extension. Lie on your stomach with your arms at your side. Simply lift your chest up off the floor and hold. Some low back arching is okay but it shouldn’t be significant.
Take note of your ability to coordinate these moves, how many reps, how long you can hold, etc. If you’re neck feels sore then it’s a big sign that you need to take time to re-coordinate your upper back muscles!! (See all the exercises below.)
Mid-back flexibility
The thoracic spine is relatively stiff compared to the rest of the spine because it attaches to the rib cage and provides stability for all of our organs. With bad posture it can be notoriously stiff and painful. Use these flexibility guidelines as a place to start.
- Thoracic extension. While sitting, place your hands behind your head with the elbows bent and about shoulder width apart. Keeping the low back still (don’t arch), extend your upper back as you lift the elbows and chest up toward the ceiling.
- Alternatively, if you know you have a stiff upper back and you are struggling with coordination that move may feel impossible. Instead, try standing against a wall with your upper back and back of the head touching (the low back can have a slight arch- no more than 1-2 finger widths). Then, see if you can keep your back still and glued to the wall as you move your arms up overhead. You should have enough back flexibility (and shoulder flexibility) to complete this comfortably. Do not let your ribs jut forward or low back arch. If this is hard, take note of how high you can lift your arms and go from there.
- Thoracic rotation. In sitting, simply cross your arms at your chest. Rotate to one side and then the other. You should be able to reach 45 to 90 degrees of rotation.
While we aren’t specifically covering the neck today, a lot of the issues with neck pain can actually stem from the mid-back. So these assessments are all a great place to start.
**Please remember, this is meant to be general overview and we skipped a lot of major muscles groups that would be great to review further with a physical therapist.

Putting it all together
All of the joint motions and muscle strength that we just reviewed are meant to work in sync with each other to create smooth coordinated movements. Hopefully, they give you a deep understanding on how to maximize your exercise program. Pair this with your core strength routine we discussed last wee and you will feel unstoppable with a full body workout (lower body article coming soon)!!
Upper body coordination can be tricky. There are so many moving parts that make it easy for the body to compensate for a stiffer or weaker area. For example, you may have noticed that moving your arms makes your back or neck stiff. Or that you your upper back is stiff and makes it hard to stabilize and move your arms through a full range.
My experience with an upper body assessment
The first time I went through a full upper body assessment, I learned how terrible the range of motion was in my right shoulder from past swimming injuries. That was paired with significant stiffness in my mid-back (specifically into extension) that made it feel impossible to coordinate overhead motions without causing my mid-back and neck pain.
The truth is we all usually have some type of stiffness, weakness, or too much mobility that limit our potential. While you shouldn’t lose sleep over your weaknesses (we all have them), it can give you an idea for how you can be even better! This can help prevent injury, unnecessary stiffness, and give you the energy you need for optimal upper body function.
Tips for your upper body exercise program
Hopefully you already have some form of upper body strengthening in your workout routine. If so, you will (if you haven’t already!) get some great ideas for making it better. If not, you will have a great starting point as well 😉
- Always start light and build from there
- Focus on form- good posture and neck relaxed!
- Isolate the correct muscle groups
- Stop or modify if you can’t keep good form
- Keep the wrists neutral to prevent aggravation

Some of my favorite upper body exercises
There are so many ways to get started with a solid upper body exercise program. I prefer these strength training exercises that focus on smaller muscles groups instead of power moves like a bench press, push up, or overhead press. Here just a few of my favorites to get you started:
Upper body strength
Start with 10-15 reps and light weight, then build from there. Soon there will be a video here explaining these with a live demo (workout video coming soon!).
- Reverse Fly. Hinge forward at your hips until your back is parallel with the floor (or close), keep the knees slightly bent. With the arms dangling and a slight bend in the elbows, squeeze the shoulder blades together as you bring the elbows straight back toward the ceiling.
- Bent over row. Same position as above with the elbows bent to 90 degrees, this time keep our elbows tucked into your side as you squeeze the shoulder blades and bring the elbows back behind you.
- Tricep dips. Sit on the edge of a chair or other sturdy surface. Place the bottom of your palms on the edge of the seat as you shift your weight into your hands. Bring your butt forward so that it’s no longer touching the chair. With your neck relaxed and elbows staying tucked into your side, bend your elbows as you drop your butt down toward the floor. Go as far as you can comfortably go before returning. The straighter your legs are the harder it will be.
- Double arm external rotation. Hold a light resistance band in your hands with the palms facing up, elbows tucked into your side, and forearms parallel to each other. Keep the elbows tucked as you rotate the shoulders to pull the hands away from each and squeeze the shoulder blades together. Keep the motion slow and controlled in both directions.
- Wall angels. Stand against the wall with good posture- butt, mid-back and the back of the head touching the wall, eyes are level and there is only a slight arch in the low back. Then, place the back of the hands against the wall at your sides. Keeping the arms against the wall, lift them up as high as you can go while keeping good form- neck relaxed! Hold up to 5 seconds and return to the starting position. If too difficult in standing, you can try it lying down.
- Horizontal abduction. Hold a band in both hands with the palms facing down and arms straight out in front of you. Keeping the elbows straight and arms level with the shoulders. Then, pull the hands apart as you squeeze the shoulder blades. Go as far as you can comfortably. Adjust the band resistance to keep your neck relaxed.
- Front/side raises. Simply stand with weights (dumbbells) in your hands at your side. With the elbows straight, alternate between lifting both arms straight out in front and then straight out to the side.
Upper body stretching
These stretches focus on stretching the mid-back and shoulders all at once! I always feel great after these stretches. Hold each one for 60 seconds for 1-3 sets. With stretching, always make sure you stay relaxed and don’t force any painful motions.
- Prayer stretch. Start on your hands and knees with the arms out in front of you. Bring your butt toward the heels as you bring your head toward the floor and rest your chest on your thighs (if possible). Keep your arms outstretched in front of you as far as possible to get a good shoulder and mid back stretch at once. Relax and breath.
- Cat-cow. Start on your hands and knees with the hands directly under the shoulders and knees under the hips. First, tuck the pelvis, bring the upper back toward the ceiling and chin to the chest (to make a “C”). Then, reverse the motion to extend the entire spine as you drop the belly toward the floor and look up toward the ceiling. Move rhythmically with your breath.
- Upper trap stretch. Sit in a chair with good posture. To stretch your right trap, gently hold onto the chair with your right hand. Then, bring your left ear toward the left shoulder until you feel a stretch in the right side of your neck. For extra pressure, bring the left hand overhead to reach the right ear and gently pull toward your left shoulder. Repeat on the left side.
- Pec stretch- standing. Find a doorway or a corner for this one. With your elbows bent and arms at shoulder level, place your arms against the doorway (making a “touchdown” position). Then, get in a small lunge position with one foot forward. Lean forward into the front foot until you feel a stretch in the chest.
- Pec stretch- supine. Lie on your back with the knees bent. Start with your arms out to the side while touching the ground. Keep the arms touching as you lift your arms up toward you ears, stop when you feel a strong stretch in the chest. Keep the arms relaxed and resting on the ground. Alternatively, you can keep your arms at 90 degrees (out to the side), then bend the elbows and bring the hands up toward the ceiling. From there, let the back of the palms fall back toward the floor as far as possible. Additionally, to progress, you can also lie on a foam roller and do the same stretches (parallel with the spine).
- Spine mobilization on a foam roller. Place a foam roller on the floor and sit in front of it with it perpendicular to your spine (knees bent and feet flat on the floor). Put your hands behind your head as you lean back onto the roller. Lift your butt off the ground and roll up and down across your mid-back. If you find a stiff or sore area, you can stop and hold that spot and even extend a little further against the roller.
Pick a few that you think would benefit you most to get started and build from there. If you’re short on time, start with 5 minutes per day. If you’re short on motivation, find an accountability partner or just do it anyways. 🙂 The best time to get started and make your upper body workout the best possible is right now!
How will you start?
What are your favorite upper body strength exercises? From what we reviewed today, what exercise(s) can you add to your current routine (or how can you get started)?
Remember this…
Making your health a top priority can be overwhelming, especially if you feel like you’re just getting started, starting over, or trying to make some pretty big changes. I can help! I put together an amazing guide book and resource for helping you set and work toward goals and habits that will actually stick. Get your copy here!

